

Welcome to your new Cimplify CRM system! This guide covers the full log in process including setting up MFA which stands for Multi Factor Authentication and is essential to keeping your data secure.
Summer 2026 updates:
- Our platform provider, Salesforce, now requires System Admins and other high security users to set up a phishing-resistant Passkey (a secure sign-in method that checks your trusted device, fingerprint, or face).
- Scroll to the bottom of this article for guidance on disconnecting and reconnecting your MFA, for example if you have replaced your mobile phone or need to upgrade to a more secure method.
The first thing to know is that the system lives in ‘the cloud’. That means you first connect to it using a web browser. Initial setup MUST be from your laptop or desktop – NOT a mobile device. There is a mobile app but we do not cover its use in this guide.
Our recommended web browser is Google Chrome
o Microsoft Internet Explorer is not supported.

Logging In for the first time
The first time you log in will be via a link sent to you by email from support@emea.salesforce.com
Subject: Finish resetting your Salesforce password
The email will contain a long link for you to click.
DO NOT click if accessing email on a mobile device
Only try to do this on a laptop/desktop
Next you’ll see the screen to set your new password and Security Question, which you can choose from a list. (right)
Your password will need letters and numbers. And please be sure to remember it!
Once you’ve entered these details you’ll be taken to the Cimplify home page (customised to your charity) which will look like the screenshot below.
Note: For future logins please bookmark: https://login.salesforce.com/

Next: Set up MFA (multi-factor authentication).
This ensures that your user account is fully secure against password theft, phishing or hacking.
You may use a built in Passkey or a smartphone App. This will partly depend on your security level.
If you are a System Admin (generally one or two people in each organisation) you will need a Passkey.
>>> For the Passkey method scroll to bottom of page for instructions.
If you are a normal user then you can opt-out of the Passkey method and choose to use an Authenticator App. You may wish to do this if your PC or Mac is not equipped with fingerprint scanning. We advise using the Salesforce Authenticator app on your smartphone in most cases. It is the only Authenticator we can provide technical support for.
>>> Those already familiar with / using another Authenticator app such as the one from Microsoft or Google you can choose to use these. If you do they will present you with a QR code on screen that you can scan with your smartphone camera to connect the device.
Where to find the Salesforce Authenticator app.
Search “Salesforce Authenticator” in your phone’s app store or click links below.
Apple App store
https://apps.apple.com/us/app/salesforce-authenticator/id782057975
Google Play store
https://play.google.com/store/apps/details?id=com.salesforce.authenticator&hl=en&gl=US&pli=1
Setting Up…
Start by logging out of Cimplify. You do this by clicking on the icon in the top right hand corner of the screen and selecting Logout (see screenshot below).

Logging out will take you back to the login screen which asks for your username and password. Enter these to proceed, which will generate the prompt below (screen 1 below).
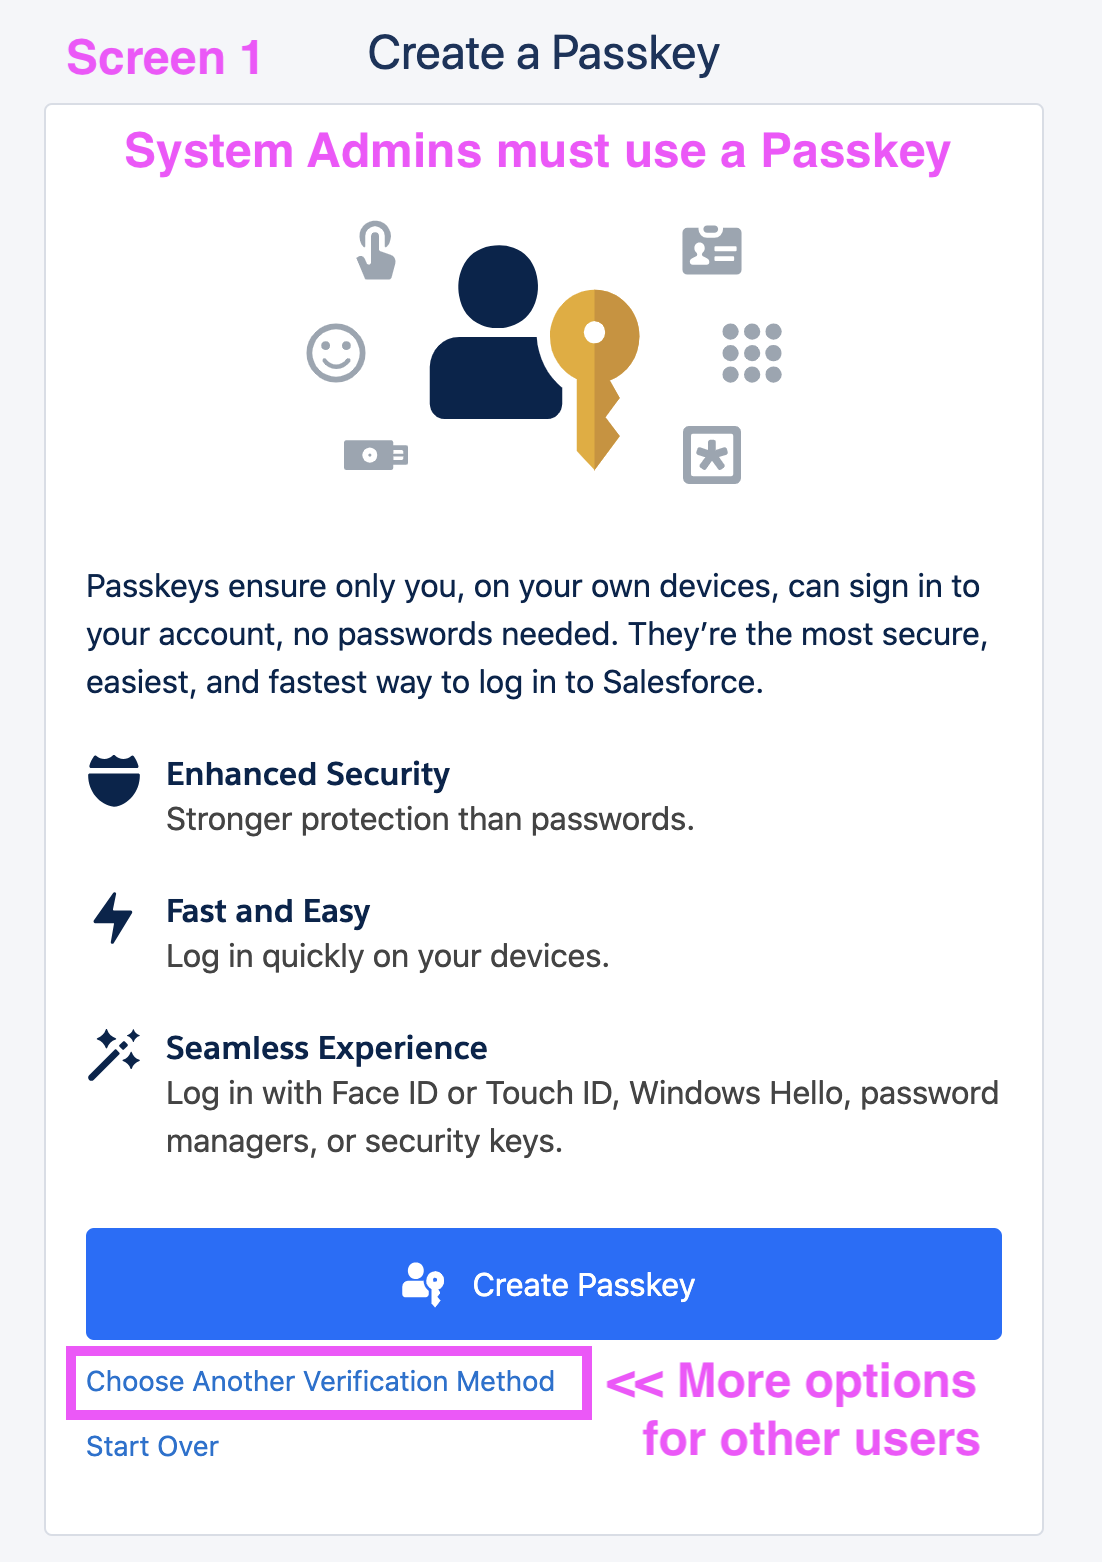
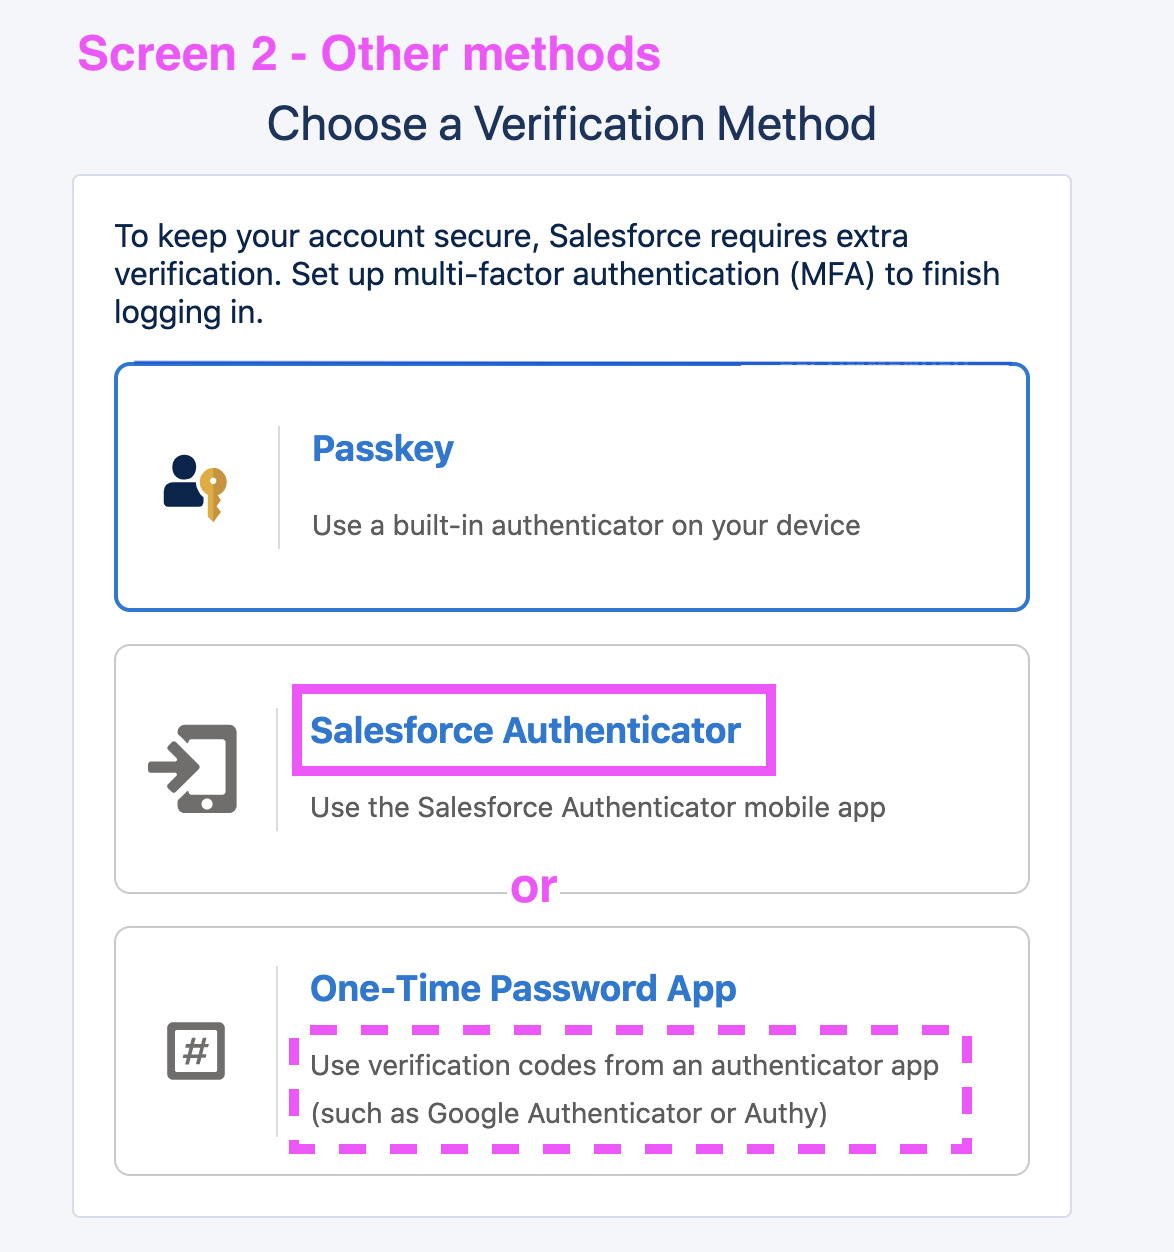
A new pop up will appear asking to connect to the Authenticator app on your smartphone. It wants to know a Two-Word Phrase
e.g. numerous style
Open the Salesforce Authenticator app you downloaded onto your smartphone and click through the welcome screens until you arrive at the screen that asks you to connect an account. Below are screenshots showing what you should see on your smartphone and computer screen.

The first 3 screenshots appear on your smartphone, the final screenshot will be shown on your computer screen.
Begin by clicking Add an Account on your smartphone, the two-word phrase is then revealed. Enter it into the box on your computer screen and click connect.
A green tick will appear on both devices to show you have been successful.

On the left you see the popup notification ‘ping’. Click to open the Approve screen.
NOTE: Don’t worry. You will only have to complete the process of connecting your account to your authenticator once. Next time you login will be much quicker!
From now on whenever you login to your account ensure that you have your smartphone handy.
Once you enter your username and password your smartphone will ‘ping’.
Click on the notification to open the authenticator and then click the blue ‘Approve’ button.
See screenshots on right…
TROUBLESHOOTING:
If you do not receive a ping next time you log in please double check your device settings and ensure that Notifications are allowed for the Salesforce Authenticator app.
There is also notification setting toggle within the Salesforce Authenticator app itself, click the cog in the top left hand corner of the app screen to access and change this setting ensuring that push notifications are set to enabled.
Using a Passkey (built in identity checker e.g. Apple Touch ID / Windows Hello)
If you have selected this option follow the screenshots below. Apple version shown but Windows very similar:
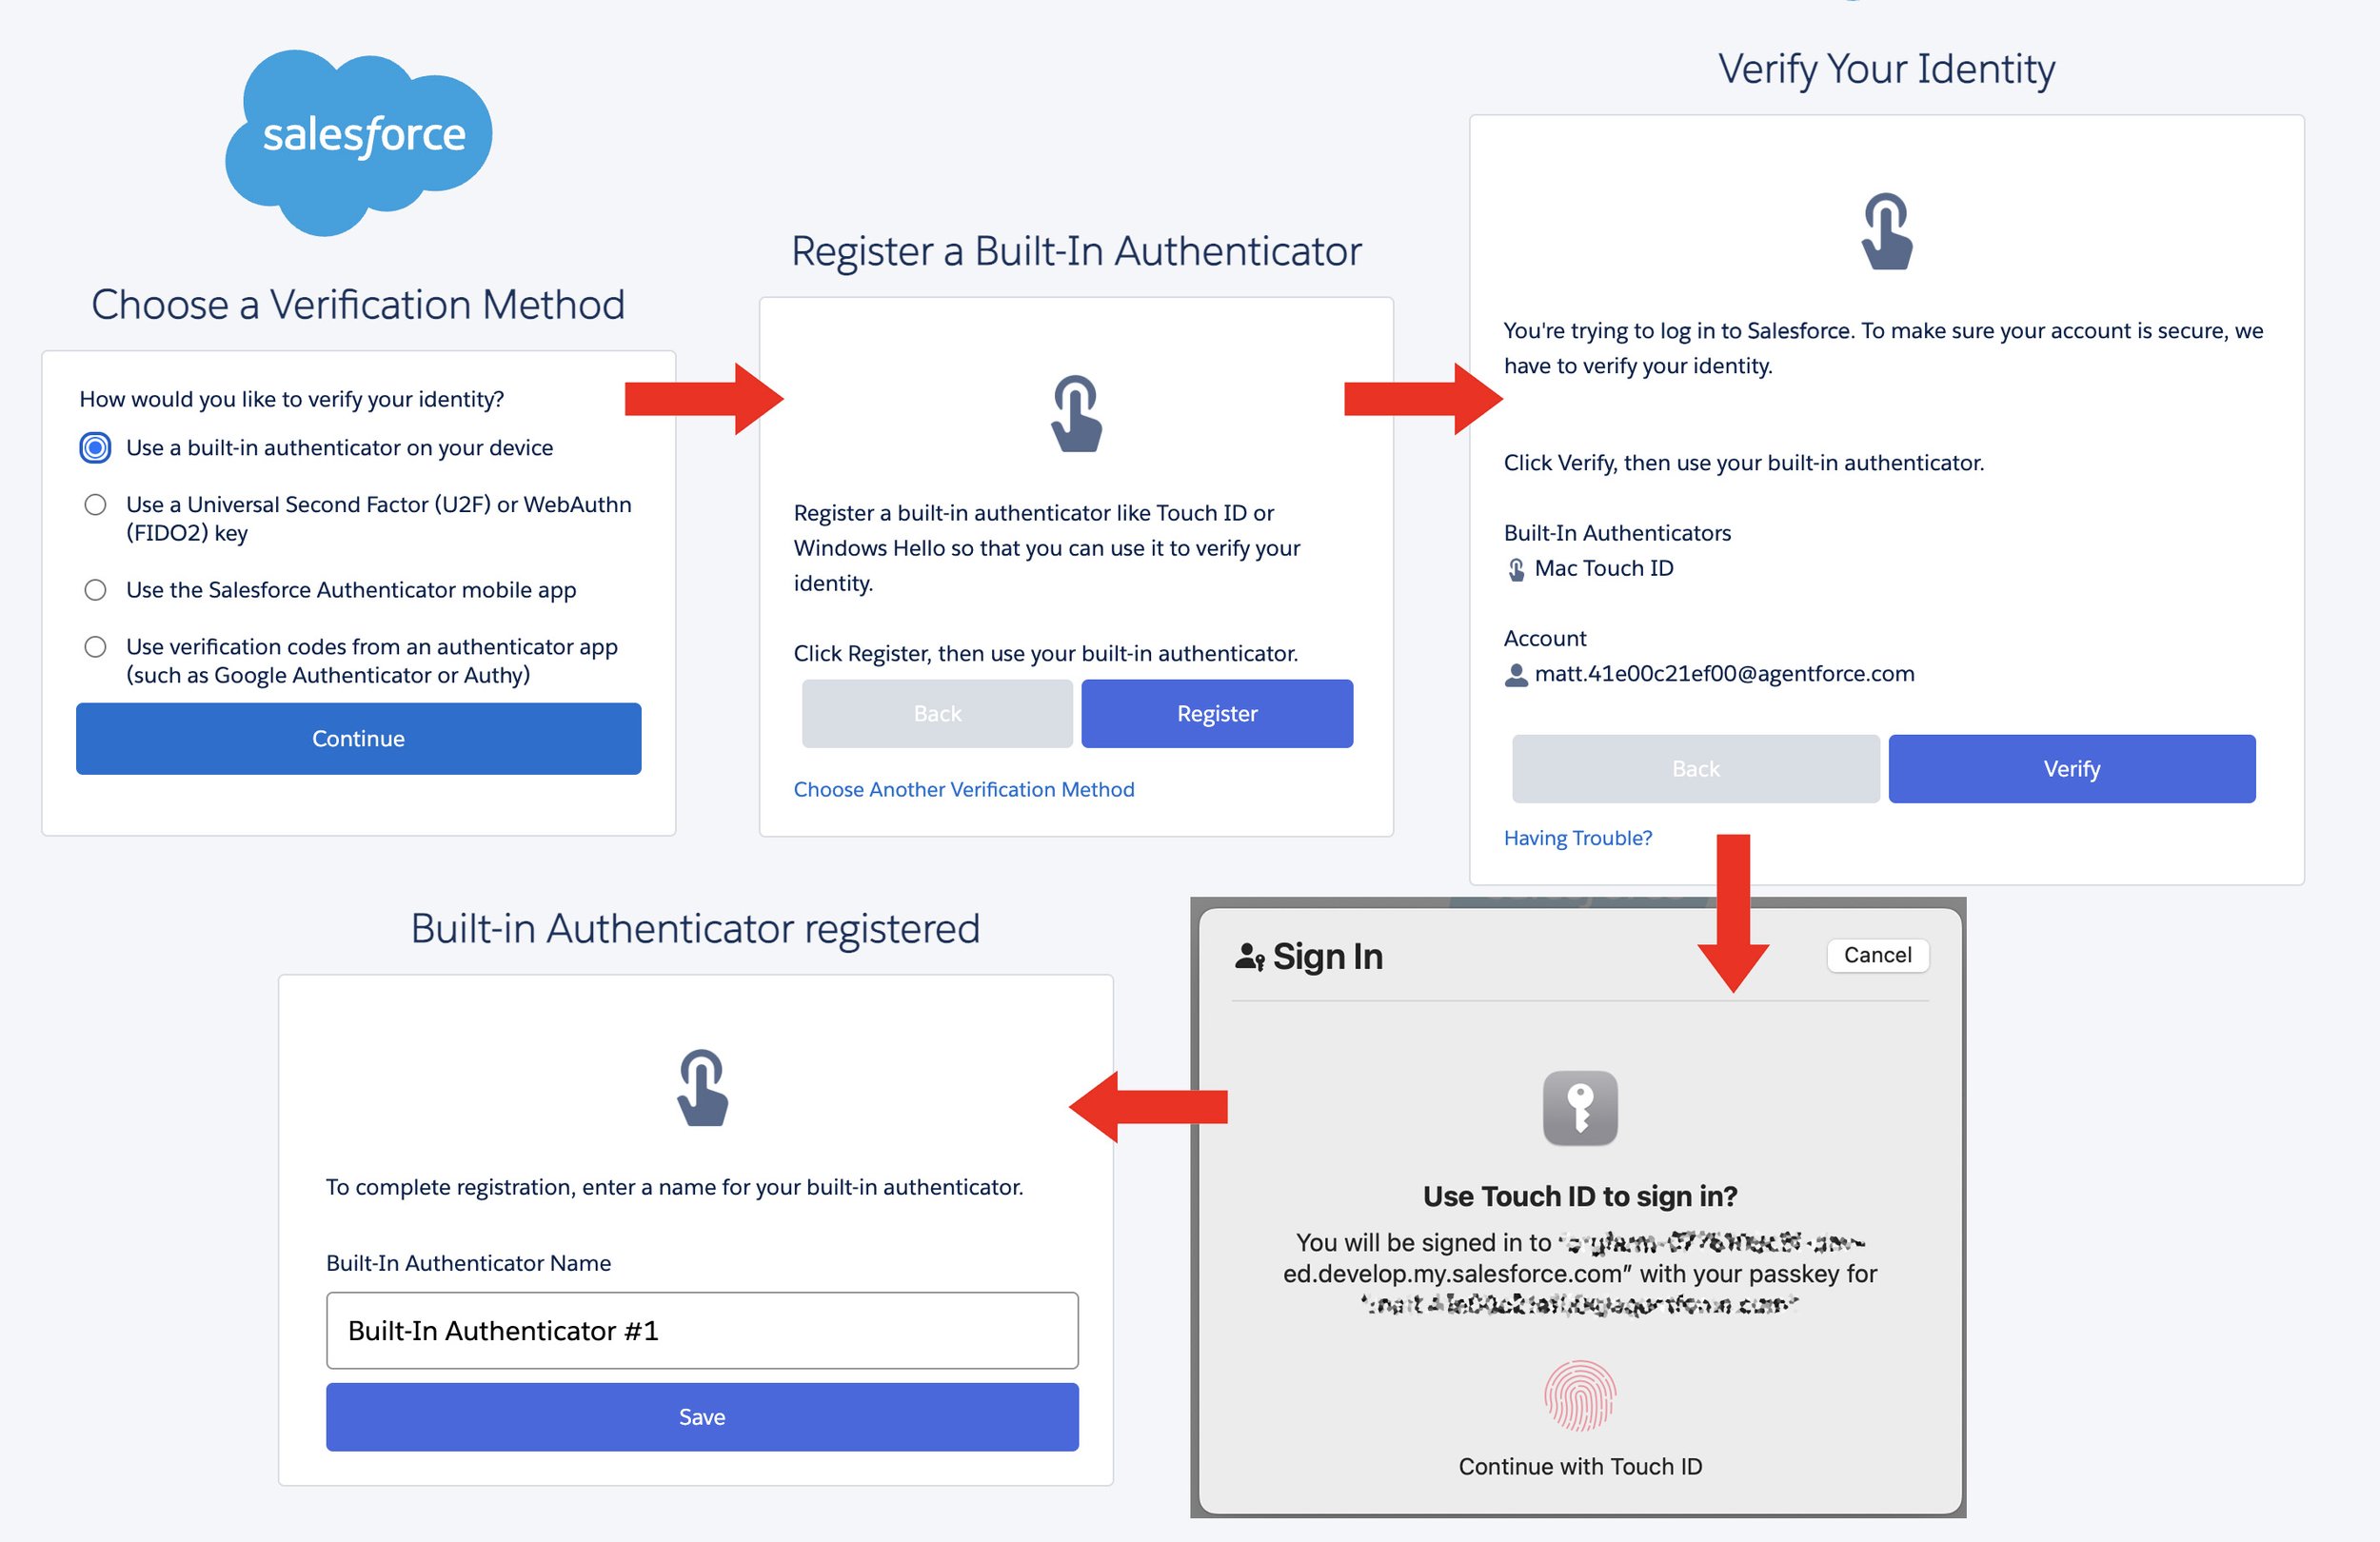
Follow these steps to set up MFA identity verification using your built-in device security
Important: In the final step you will be asked where to save the Passkey.
If you intend to use Cimplify from more than one device do NOT store/save the Passkey on the hard drive of your laptop.
Instead choose the option to save the Passkey on your Android or Apple device. This option gives you the flexibility to login from different devices (e.g. work and home laptops) using a QR code verification method.
What if I replace my phone, or need to replace my MFA method?
It is sometimes the case that system users may replace the mobile phone on which the authenticator app was installed meaning that they will need to reconnect their new device. Or perhaps they wish to switch MFA method, for example from a Mobile App based method to a Passkey based method on their laptop e.g. Windows Hello or Apple Touch ID.
Below are the instructions simply to disconnect the old device.
These instructions assume the user is being pro-active in changing their MFA method BEFORE changing their phone, and not simply discovering they are locked out of Cimplify due to no longer having their old mobile handset. If this is the case a support ticket will need to be raised.
Revisit the full article above to recap on how to then connect a new device.
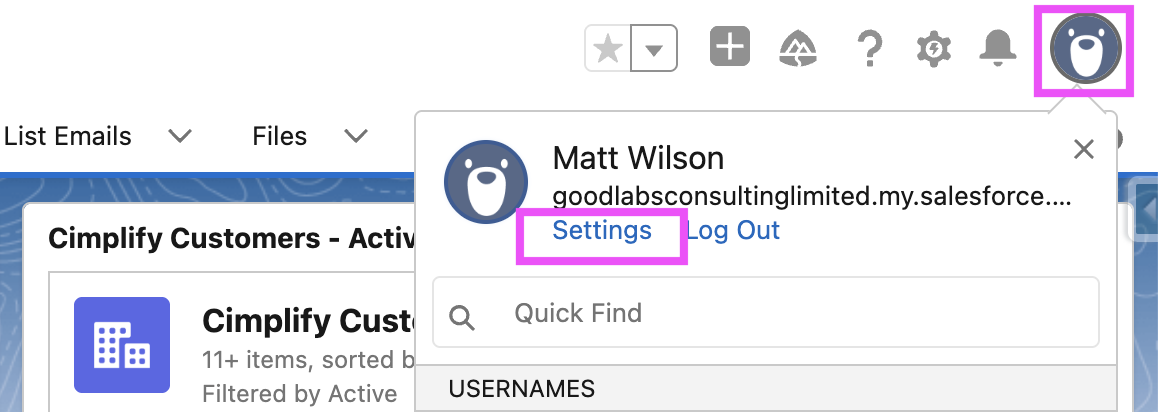
A) First click on the ‘bear’ icon on the top right hand corner of your Cimplify screen and click on settings.
B) On the next screen click on Advanced User Details and find the method you need to disconnect.
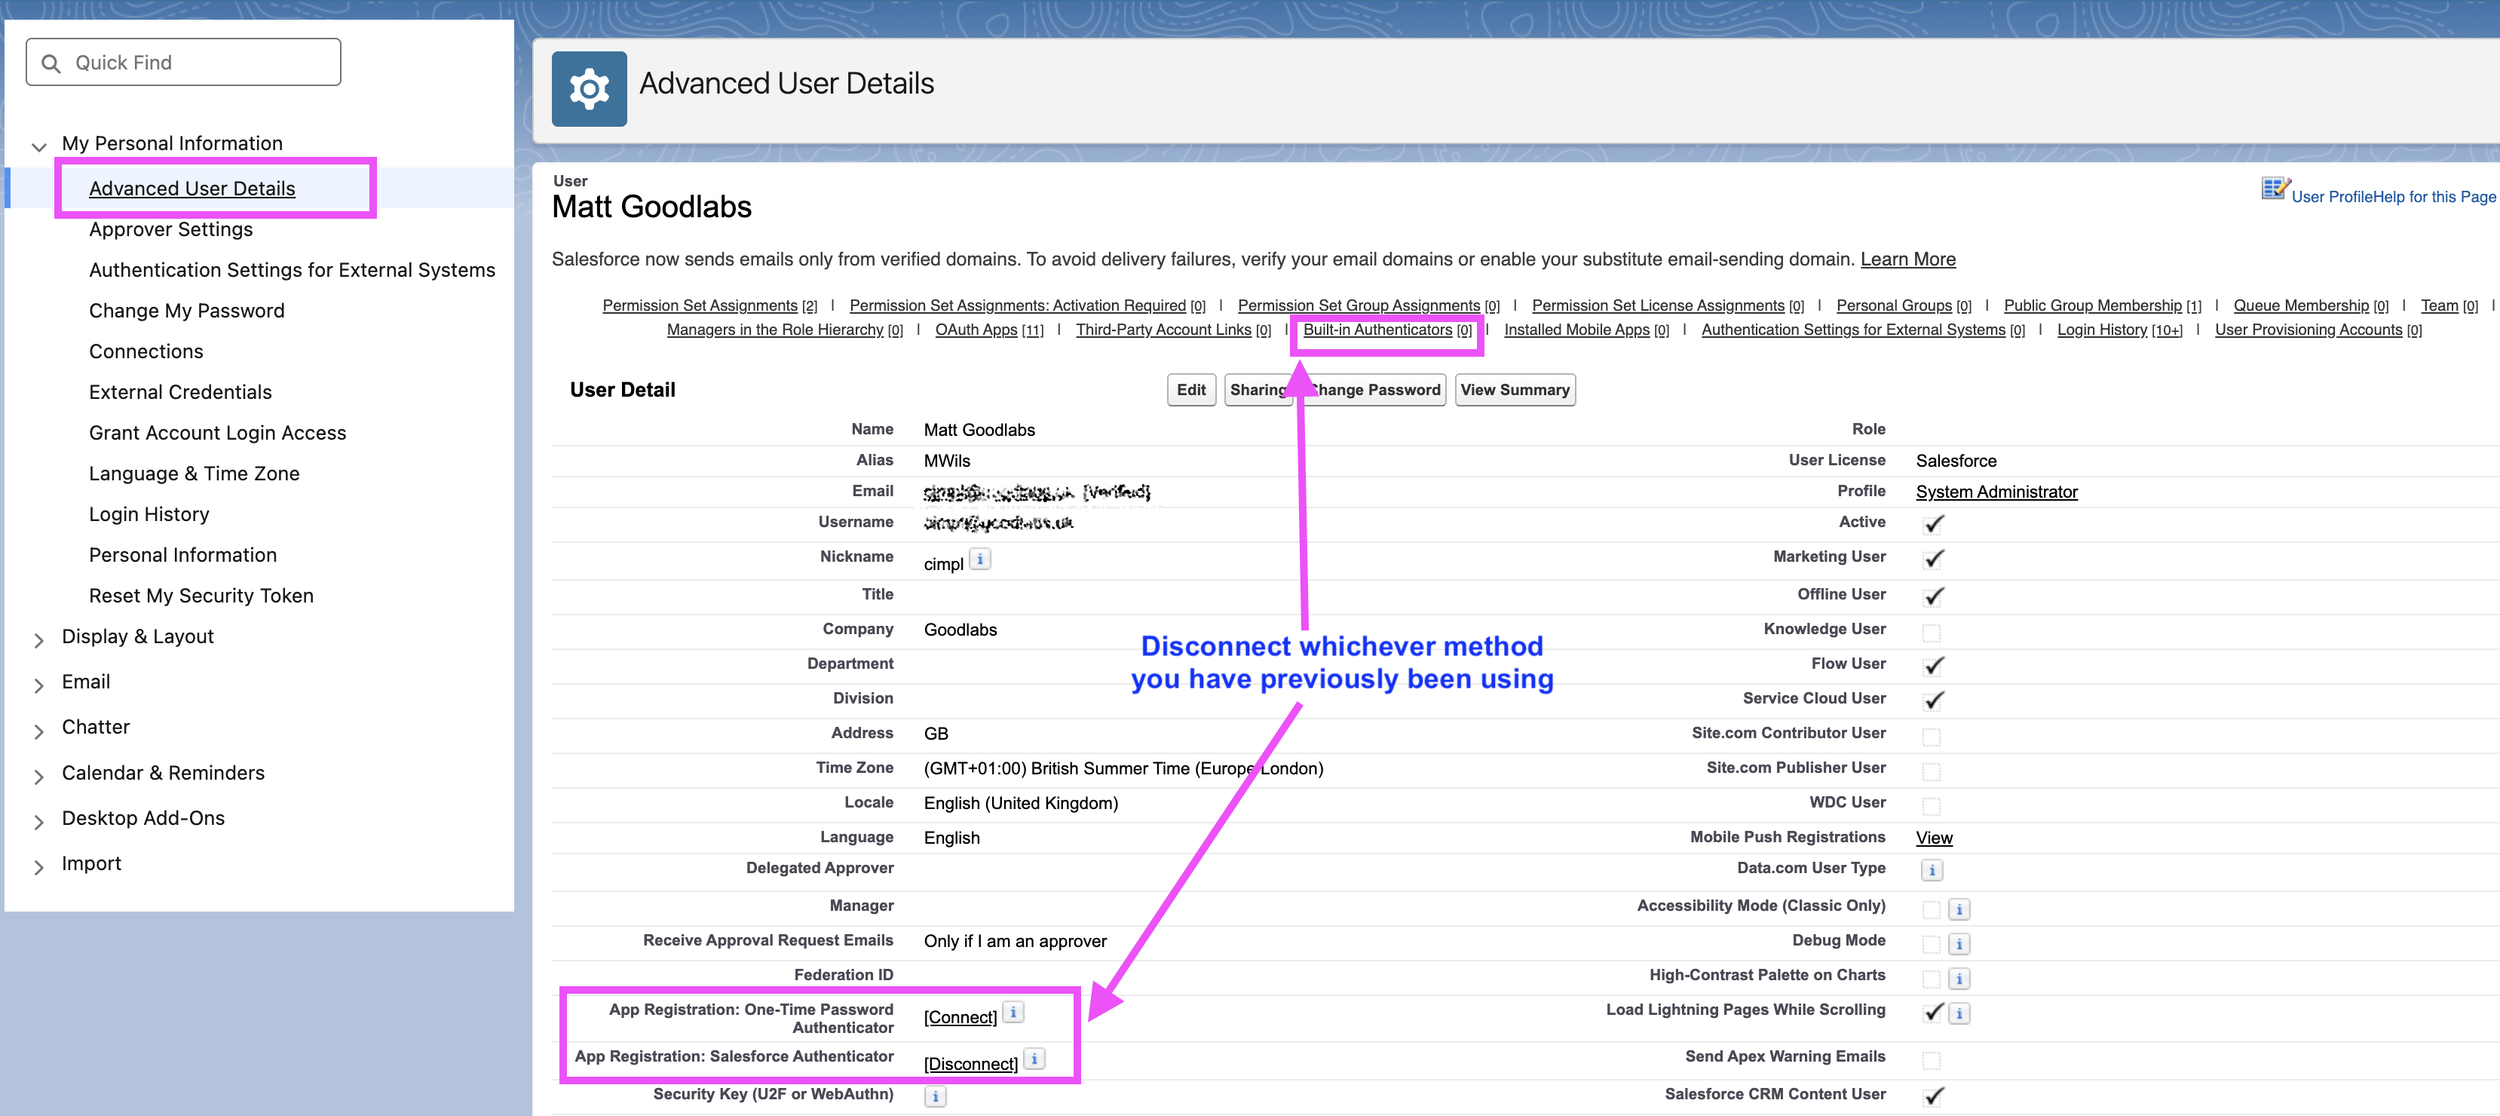
C) Return to the ‘bear’ icon on the top right hand corner and this time select the log out option. This will return you to the main login screen enabling you to connect a new MFA method. See instructions above.